Sunday, March 3, 2013

A+ Apple Bread

Yesterday, I read a Facebook status that read, "I hope this banana bread tastes as great as my apartment smells." And that was all it took, I wanted to make bread too, but instead I wanted to try my mom's famous apple bread. Several months ago, I asked my mom for her recipe. She said something like, "Oh, it has 3 cups of apples, canola oil, sugar, flour, eggs, and walnuts--no butter, so it's fairly healthy."And that's exactly what I wrote down on my recipe card, but I had no clue how much of each. I googled apple bread and found her recipe, pretty much exactly,  here.  Want to make some for you and your family? Here are the steps!


Ingredients
cooking spray
3 cups all-purpose flour
1 tsp baking soda
1 tsp salt
1 cup chopped walnuts
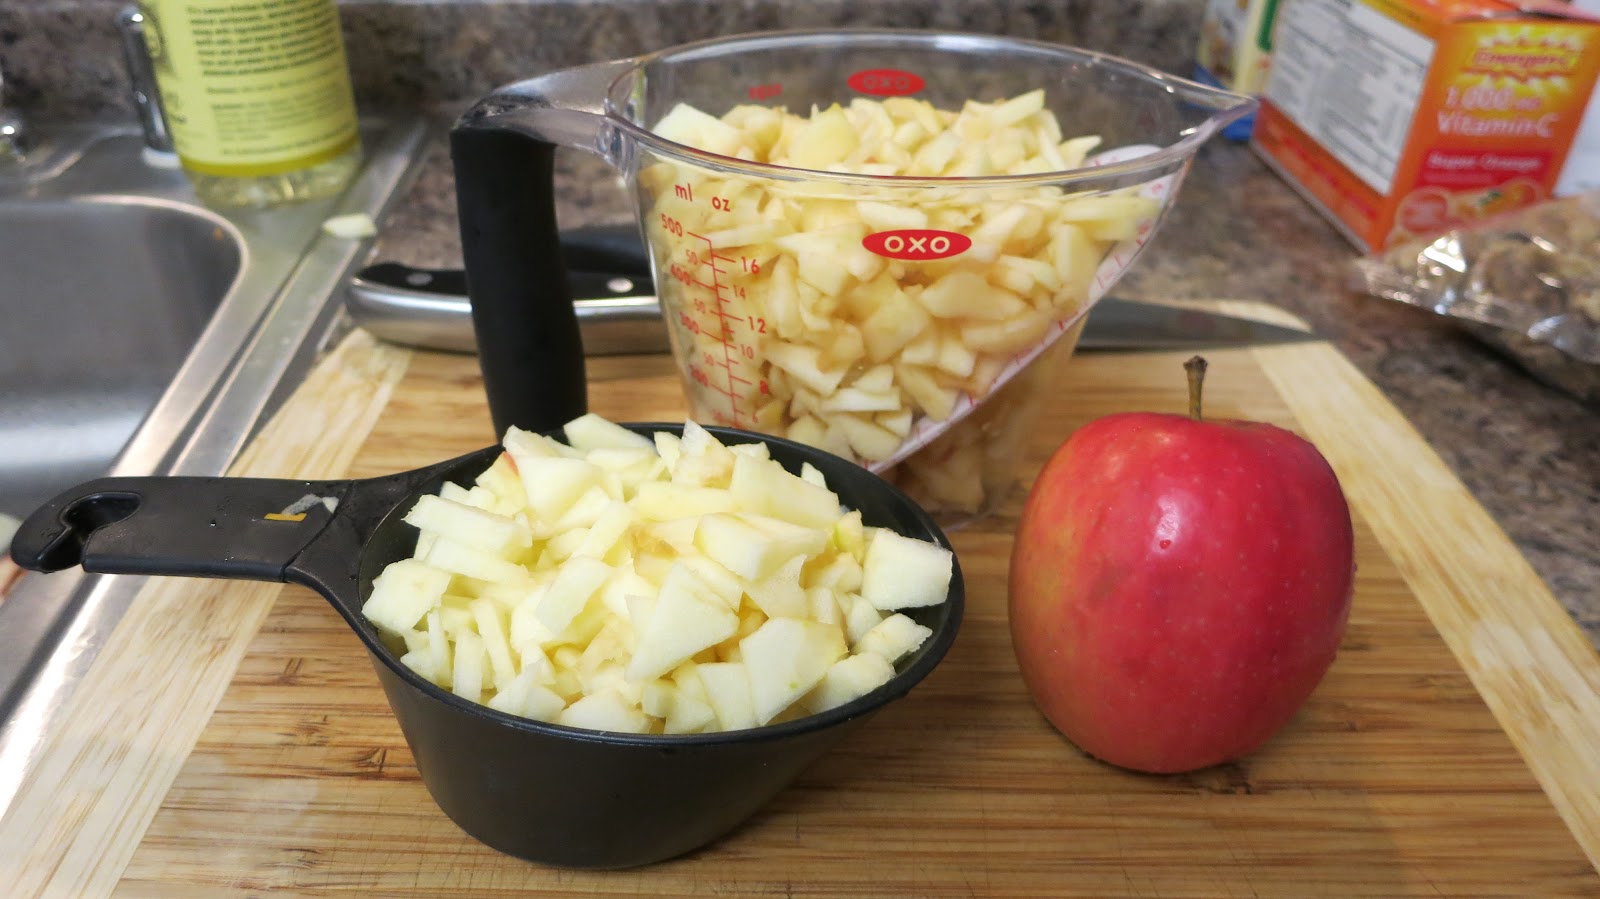
3 cups apples-peeled, cored, chopped
1 cup vegetable or canola oil
2 cups sugar
3 eggs, beaten
2 tsp cinnamon

My inventive way to keep the recipe out of the way and easy to read--Place in the paper towel holder!


Directions:
1. Preheat oven to 300 degrees. Prepare two loaf pans with cooking spray. I only have one loaf pan, so I use my mini loaf pan too, and I'd definitely recommend it. More about that later :)

2. Peel, core, and chop 5-6 apples to make 3 cups


3. Chop 1 cup of walnuts


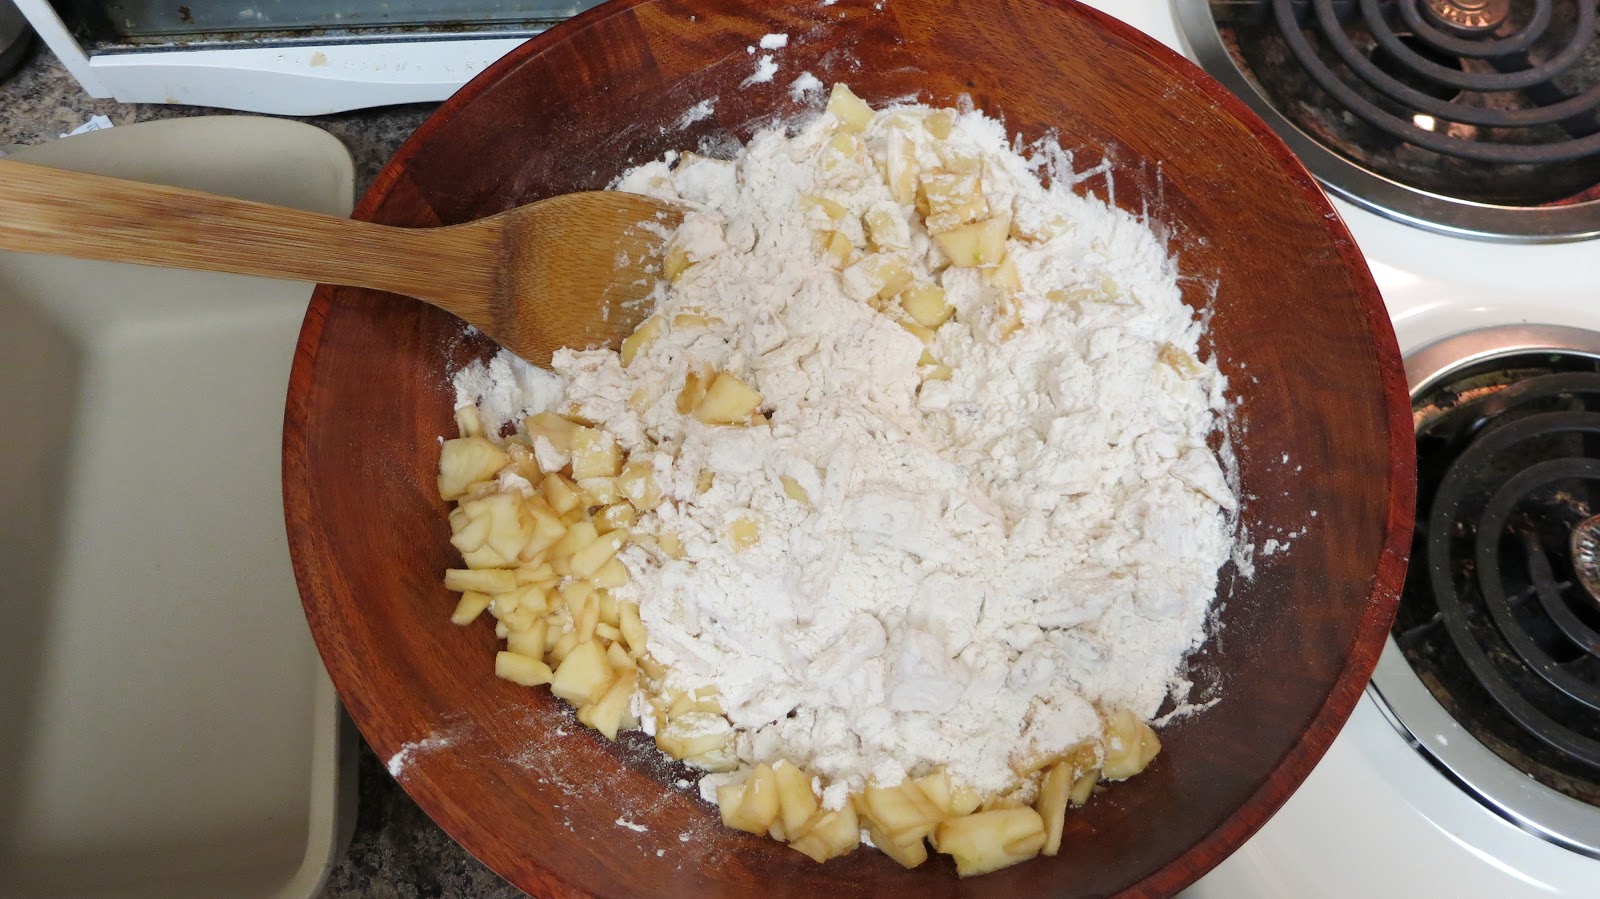
4. Mix dry ingredient in a large bowl (flour, baking soda, salt, walnuts, and apples).


5. Whisk oil, sugar, eggs and cinnamon together in a small bowl


6. Add wet ingredients to dry ingredients until just moisten.
7. Separate the mixture into the pans


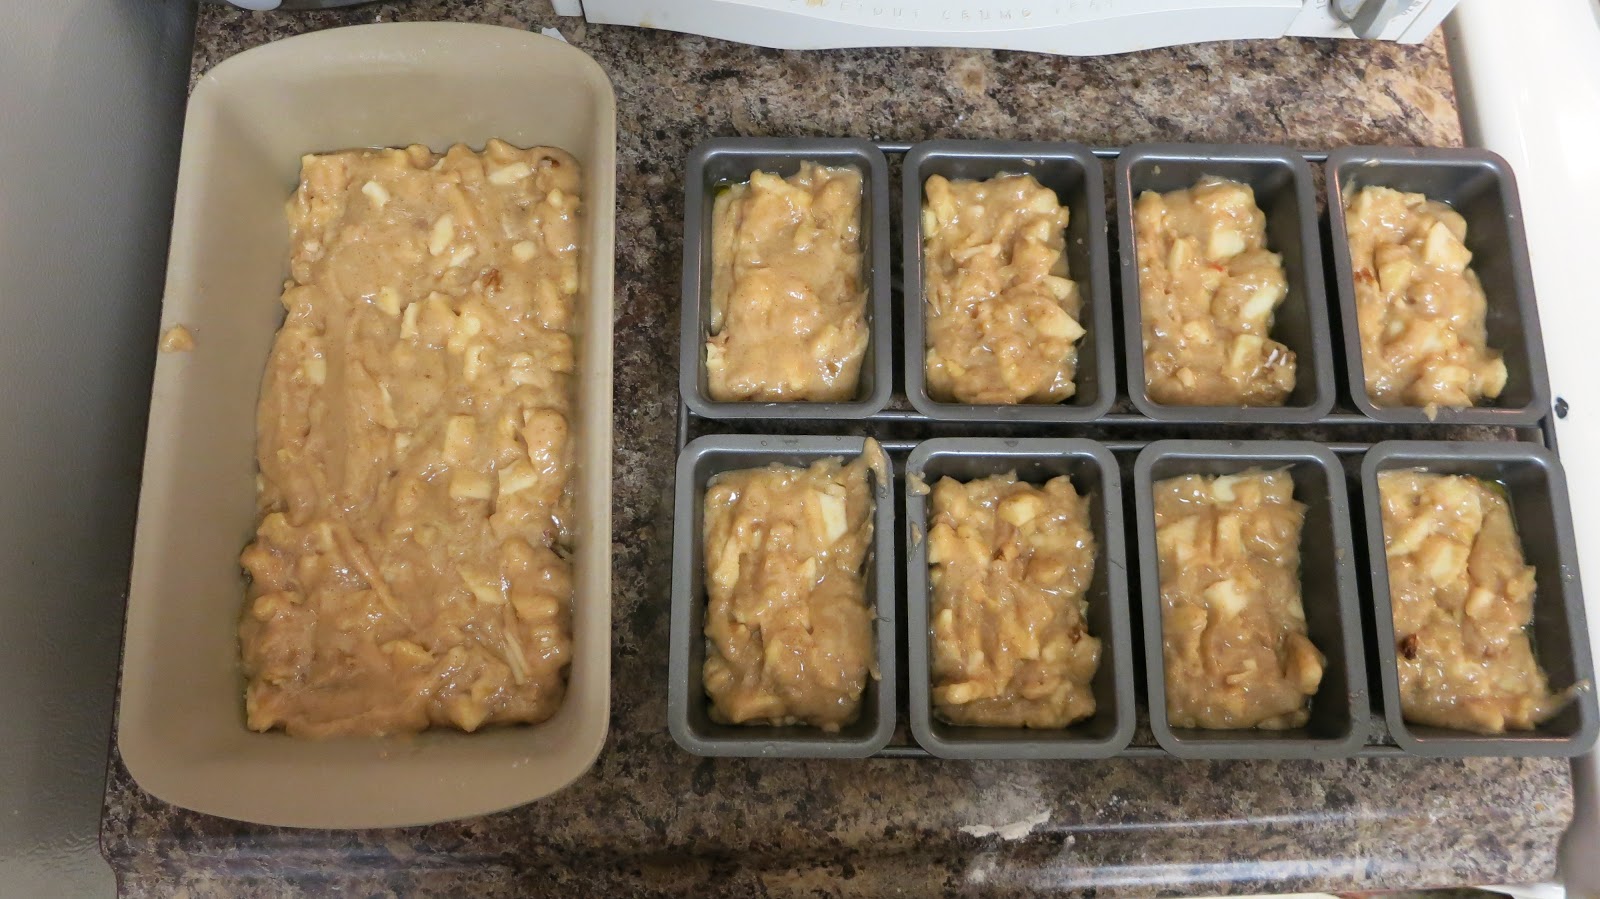
8. Bake in oven until you insert a toothpick and it comes out clean. For the smaller loafs, it took about 1 hour and the large loaf about 1 hour and 15 minutes.


9. When done, let the bread sit in the pan for 10 minutes before placing on a cooling rack.


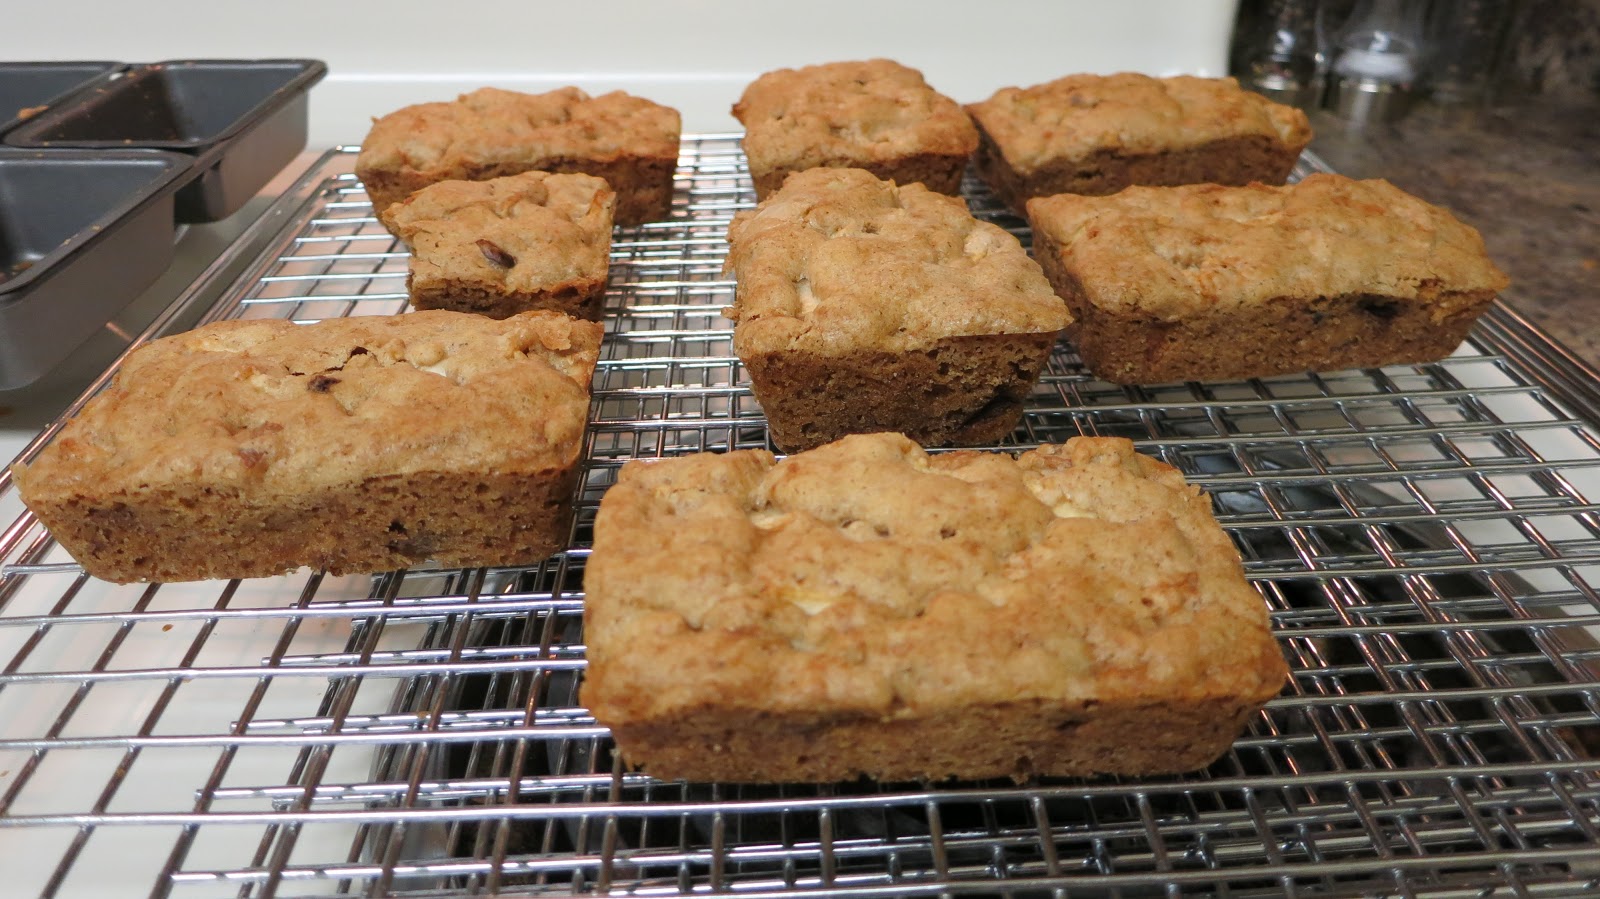
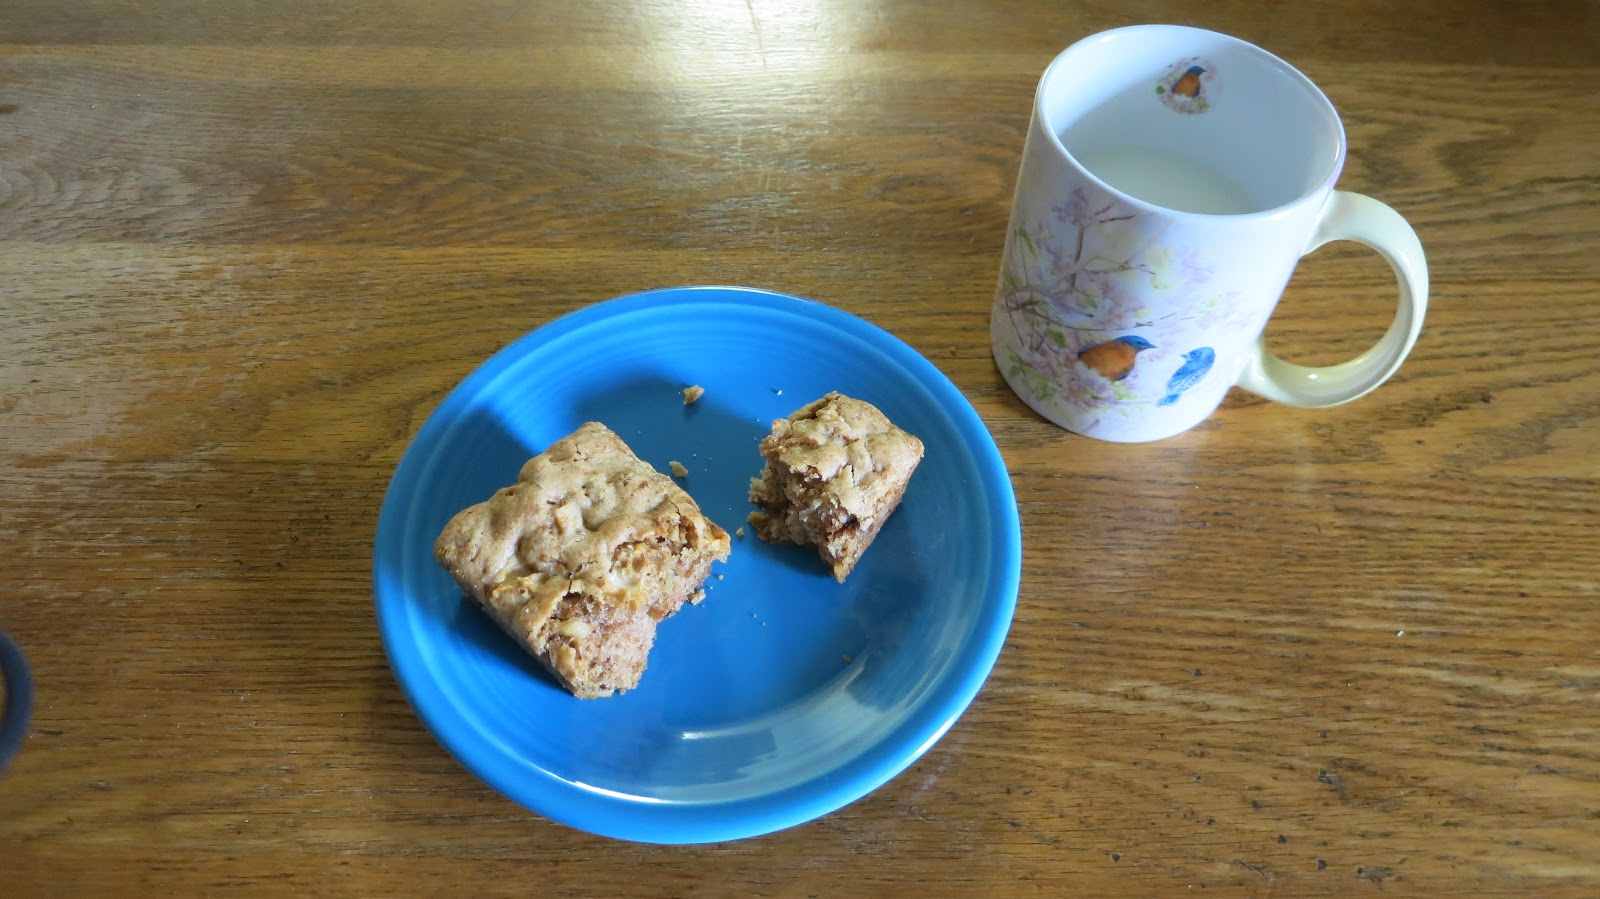
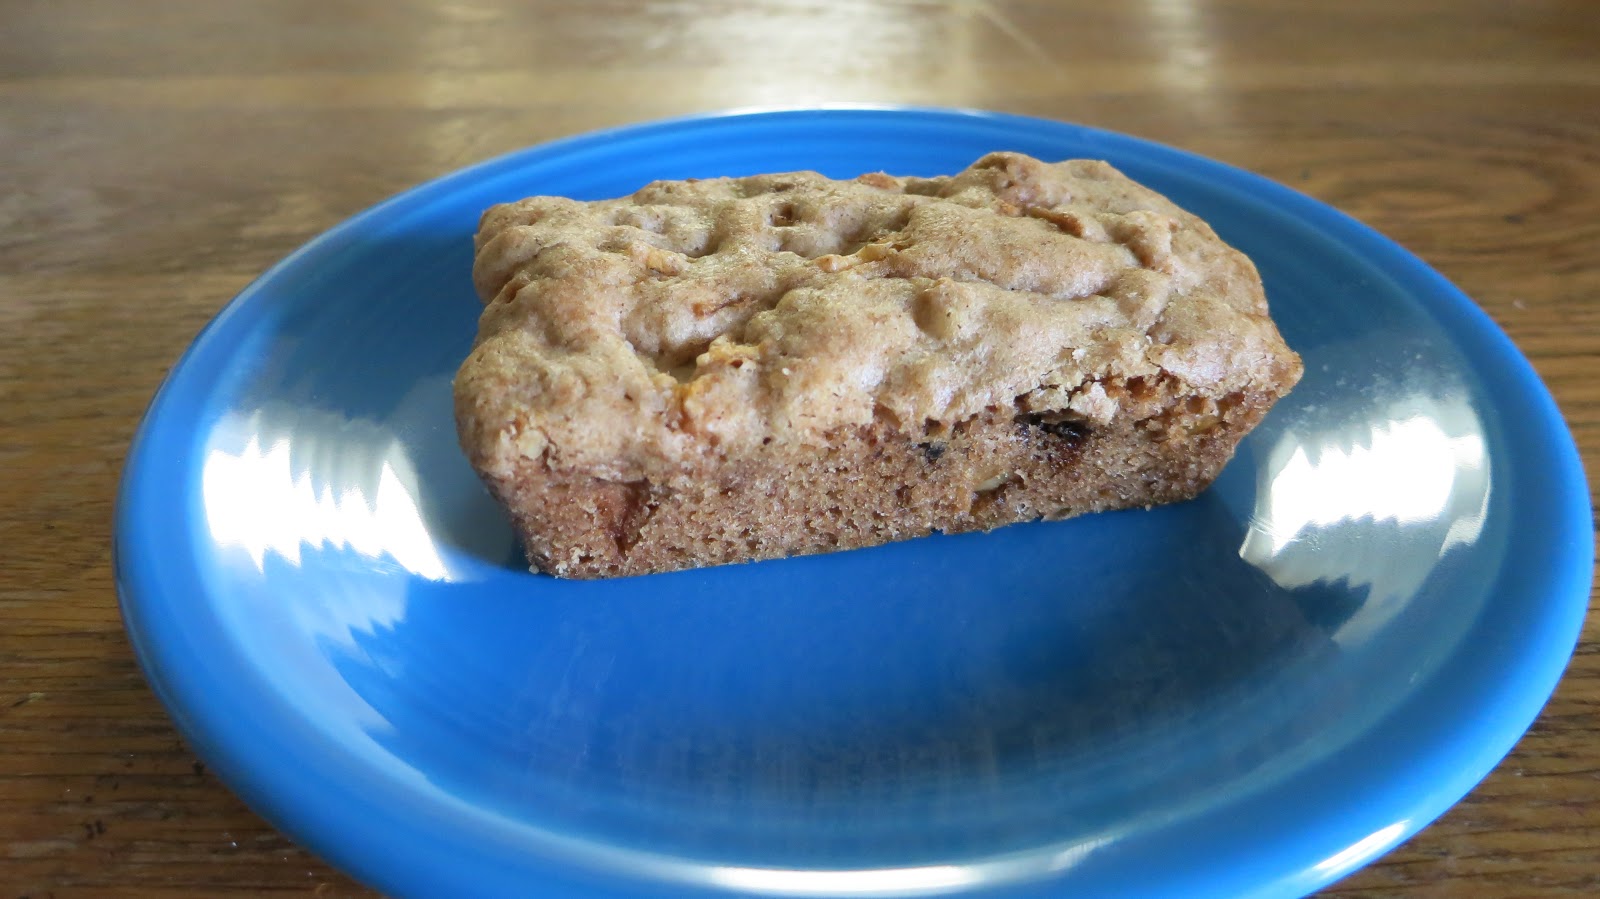
 Trust me when I say, this bread is amazing. It does take about 2 hours total to make including the prep time, but it is WELL worth it! The mini loafs were a hit with my husband because his favorite part of the bread is the crusty edges. I will definitely be repeating this recipe super soon.

It makes for a great breakfast, dessert, or snack any time!


Doesn't it just look so good! My teacher side gives this recipe an A+. Enjoy!


Sunday, February 3, 2013

Mix and Match Jewelry-Making

I'm back at it! Jewelry-making that is. I spotted some really beautiful light greyish-blue beads at Michaels and was inspired to make more earrings (and use up some of the materials  from my last earrings project). I also bought a 6 pack of gold toggle clasps (not realizing toggles are INTENDED for bracelets/necklaces until I got home and saw the bars in the pack too, hehe). Anyway, the toggle clasps worked out very nicely as the base for my new earrings, and this little misunderstanding made me realized how important it is to think outside the box when creating new pieces. I also found that I could mix and match gold ovals (toggles), circles, beads, and pearls to create subtly different style earrings. Now, I can't decide which one I like best. Which is your favorite?


Actually, I like the one in the last photo best. Who am I kidding?

Feel free to let me know your thoughts and/or any new ideas!!


Sunday, January 27, 2013

Great Falls Staycation

Have you ever heard of a staycation? If you haven't, let me explain. A staycation is a taking a "trip" to a place  that's within an hour of your home (Ok, so I made up that definition, but you get the idea). Last weekend, my husband and I took a staycation to Great Falls, MD and had such a relaxing, fun time.

  Keith and I love to hike/bike/be outside, so it's hard to pass up an opportunity on a warmish, sunny, winter day. It did not feel like winter, more like early spring which is a a rarity this time of year.
  

Great Falls is so fun because there's a long walking trail along the Potomac River and several bridges that cross beautiful rapids.


Can't you tell we're having fun ;)


And, yes, the sky was really THAT blue on Sunday.


The best overlook and photo-op of the rapids.


Sunshine on my shoulder makes me happy.


Lovers lane lookout  :)


If you are in the Washington, DC area and get lucky with nice weather, check out Great Falls. It lives up to it's name!

Are there any other staycations that we should know about? Please tell!

Sunday, January 20, 2013

Meatball Calzone Recipe

Do you ever get sick of the same old same old dinners week after week? I was in the mood for something different last week and a calzone came to mind! My husband requested that we fill it with meatballs. And that's what we did. Well, my husband sort of took over. It was nice. Here's what we (he) did.


First, collect all the ingredients:
pizza dough
1/2 cup chopped red pepper
1/2 cup chopped green pepper
1 cup of diced mushrooms
pre-made frozen meatballs (defrosted)
1/4 cup chopped onion
1 1/2 cups mozzarella - fresh or shredded or both :)
EVOO with Italian Seasoning
Marinara to add inside calzone or for dipping - your choice


Then, roll out the dough and cut it in half. 


Next, add half of the ingredients to both of the rolled out dough.


Fold the dough in half then pinch all around to close the seam.


Brush the EVOO mixture lightly over the calzones.
Bake in a preheated oven at 350 degrees for about 40 minutes or until golden brown.


Enjoy!

Do you have any delicious calzone secrets? Love to hear from you!

Sunday, January 13, 2013

Love Throw Pillow

 After seeing the outrageous price for throw pillows that match our bedding set, I got an urge to make a unique throw pillow on a budget. Did you know matching throw pillows are $60 or more??! Insane I tell you.

Last week, I found a Ralph Lauren pillow for $15 at HomeGoods, and I snatched it up. I got a Michael's gift card as a b-day present from my sister, so of course I immediately had to go get supplies for the pillow. Here's how to make an easy, romantic, rustic throw pillow for about 20 bucks.


The steps:

1. Gather supplies including: Ralph Lauren pillow,  Scribbles Fabric paint in Wild Raspberry and Black Matte, my own Love letters pattern as seen below. (To make the letters: draw them on any type of paper and cut the letters out. You could also cut out letters using your favorite font).


2. Trace the letters slowly and carefully with the tip of the fabric paint. Fill in the letters however you like. Let dry for 24 hours.


3. And there you have it, a one of a kind love pillow for your bed.


Do you have any homemade pillows? I'd love to hear!

P.S. I got a new camera and used it for this tutorial. So excited to explore more of it's functions, but I'm loving it already!

Linking up with:

29 Candles

Last weekend my parents came to DC to celebrate my birthday and brought me this little cake. I think it's supposed to be a smash cake for one year olds, but it tasted superb.

It's the best when your birthday lands on a weekend, and Fridays start the weekend in my book! Today, I turn 29. That's right, it's the last year of my twenties. I'm having a hard time believing it really. This past decade flew by. I have to admit (well friends have pointed these things out when I started complaining about getting old) that I am in a good place for being on the brink of dare I say 30.

So far in my twenties I...

-graduated college with a master's degree
-moved to a big city and started anew after living in a small town in West Virginia for 23 years
-landed a steady, satisfying job
-bought a car
-got married to the perfect guy for me


Not bad, not bad at all.


In this last year of my twenties, I'd like to check a few more things off the 20s list. Most are not as life changing, but great goals nonetheless. This year I'd like to:

1. Complete some sort of biking/running/swimming race (duathalon or triathalon) with my husband
2. Take an art/painting class
3. Buy a nice camera and learn to use it (any suggestions??)
4. Tour the White House (I've lived in DC for 6 years, why this hasn't happened yet I DON'T know)
5. Get a better idea on where we'd like to move to plant our roots

Now, I know I'm really not getting that old and you're only as old as you feel, so I plan to have a great weekend celebrating with family and friends. Happy Friday, friends!


Tuesday, January 8, 2013

Adorned from Above Link Party {co-host}


Welcome to Wednesday's Adorned From Above Blog Hop 34.     I'm so excited to be co-hosting this wonderful link party! I link up here almost every week and have met some really great bloggers.

This is a blog hop, so  you share your posts on Adorned From Above.
So on to this weeks party. The rules are easy.

1. Follow both hosts in some way (GFC, Facebook, Google+, Pinterest, Twitter, or Linky Followers )

2. Anything goes with posts. ( recipes, parties, etsy shops, crafts, inspirational writing, absolutely anything. Just make it family friendly )

3. Comment on other posts. It is a party. Get to know your fellow bloggers. I have met some of the nicest people at the parties, including my co-hosts.

4. All featured posts will be pinned on Pinterest, so by linking with this party you are giving me permission to pin your projects.

Let's get to it then. First, here are the featured bloggers from the last three parties. Featured bloggers on Adorned From Above are picked by most page views. So all of you pick these great posts.


Featured Bloggers from Party 32


Featured Bloggers from Party 34


Congratulations to all of our featured bloggers. Grab the featured button from my sidebar.

We hope you have fun at this week's party. We love hearing from you. We love your comments.

Now let's party

Have a great week.
Debi, Charly, and Melanie